Okay, besties, gather ’round because we’re about to level up your snacking game! I’m talking about the ultimate centerpiece for any gathering: a Vegetarian Charcuterie Board that’s as gorgeous as it is delish. This isn’t just a snack; it’s an experience. Think vibrant colors, textures that POP, and flavors that will make your taste buds sing. I’m Dora, and I’m literally obsessed with turning ordinary ingredients into extraordinary moments. Get ready to create a board so stunning, it’ll be the star of your Insta feed!
We’re diving deep into how to build a vegetarian charcuterie board that’s not only easy but also totally customizable. Whether you’re hosting a party, need a fun appetizer, or just want a light meal, this guide has got you covered. Get ready for a flavor explosion!
Why You’ll Love This Vegetarian Charcuterie Board
Let’s be real, presentation is EVERYTHING. A well-crafted charcuterie board is a feast for the eyes as much as it is for the stomach. But besides looking amazing, here’s why you’ll be obsessed:
- **Effortless Elegance:** Seriously, you don’t need to be a gourmet chef to pull this off. It’s all about arranging delicious things artfully.
- **Crowd-Pleaser:** From your vegan cousin to your cheese-loving grandpa, there’s something for everyone on this board.
- **Customizable AF:** Swap out ingredients based on what you have on hand or what’s in season. It’s your board, your rules!
- **Perfect for Any Occasion:** Movie night? Check. Impromptu get-together? Double-check. Fancy dinner party? This board is ready for its close-up.
This vegetarian charcuterie board is a game-changer! It’s the perfect way to impress your friends and family without spending hours in the kitchen.
Ingredients: The Stars of the Show
Okay, let’s talk ingredients! This is where you get to let your creativity shine. Remember, the key is variety – different textures, colors, and flavors will make your board truly irresistible. The cheeses are the core element, so choose wisely!
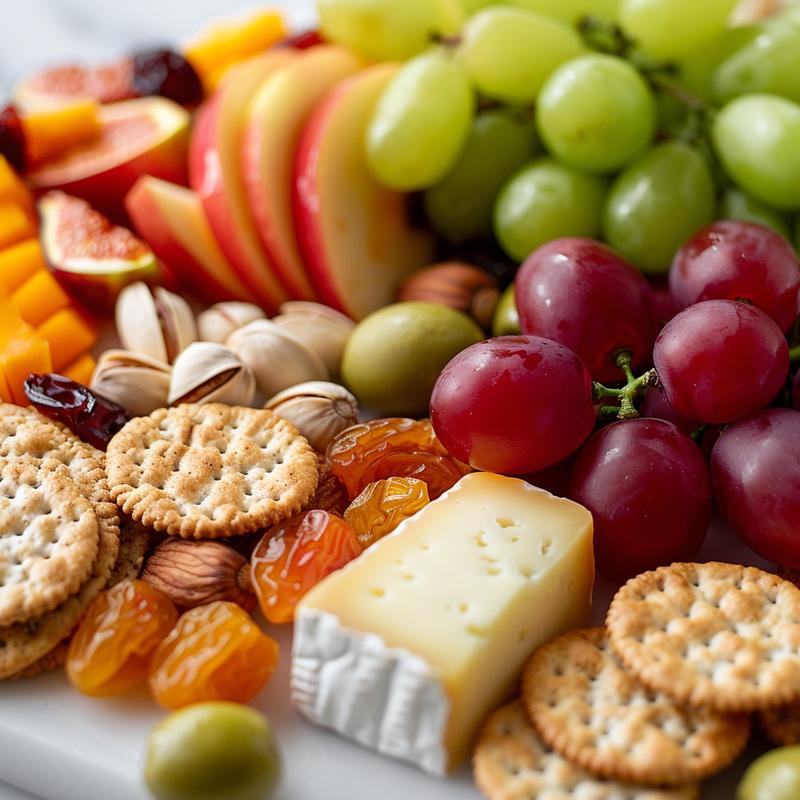
- **Selection of Cheeses (Brie, Cheddar, Goat Cheese):** A mix of soft, semi-hard, and hard cheeses is key. Think creamy Brie, sharp Cheddar, and tangy Goat Cheese. For vegan options, explore cashew-based cheeses – they’re surprisingly amazing!
- **Assorted Crackers and Bread:** Offer a variety of textures and flavors. Think crispy crackers, crusty bread, and maybe even some gluten-free options. Bread options can also include sliced baguette!
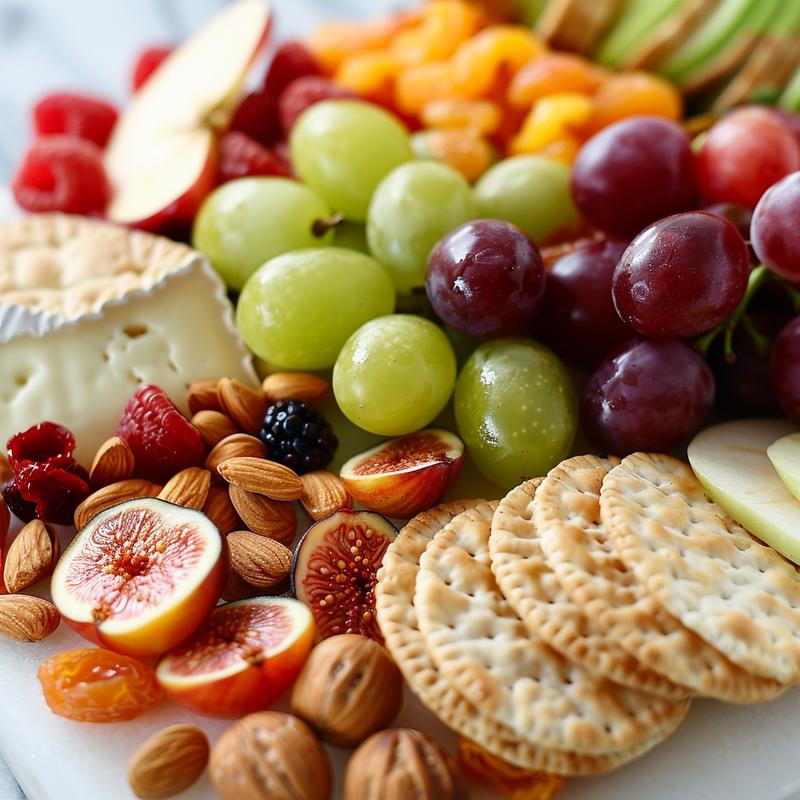
- **Fresh Fruits (Grapes, Berries, Apple Slices):** Fresh fruits add sweetness and vibrancy. Grapes, berries, and apple slices are classics, but feel free to get creative with seasonal fruits like figs or peaches. Fruits e g blueberries are a great addition.
- **Dried Fruits (Apricots, Figs, Dates):** Dried fruits add chewiness and concentrated sweetness. Apricots, figs, and dates are all fantastic choices. And dried cranberries! Don’t forget those.
- **Nuts (Almonds, Walnuts, Pistachios):** Nuts provide a satisfying crunch and healthy fats. Almonds, walnuts, and pistachios are all great options. Consider roasting them for extra flavor.
- **Olives (Green, Black, Kalamata):** Olives add a salty, briny flavor that balances the sweetness of the fruits and cheeses. A mix of green, black, and Kalamata olives is perfect.
- **Vegetable Dips (Hummus, Baba Ghanoush):** Vegetable dips add a creamy element and a boost of flavor. Hummus and baba ghanoush are always a hit, but feel free to experiment with other dips like tzatziki or pesto.
- **Pickled Vegetables (Gherkins, Cornichons):** Pickled vegetables add a tangy, acidic element that cuts through the richness of the cheeses and dips. Gherkins and cornichons are classics.
- **Artichoke Hearts:** These add a unique, slightly tangy flavor and a beautiful visual element.
- **Roasted Red Peppers:** Roasted red peppers add a smoky sweetness and a pop of color.
- **Jams or Honey:** Jams or honey add a touch of sweetness and complement the cheeses beautifully. Fig jam, apricot jam, or even a simple honey are all great choices.
- **Fresh Herbs for Garnish (Rosemary, Thyme):** Fresh herbs add a pop of color and aroma. Rosemary and thyme are particularly beautiful and fragrant. Fresh herbs enhance the visual appeal.
Building Your Masterpiece: Step-by-Step Instructions
Alright, time to assemble this beauty! Don’t stress – it’s easier than you think. The key is to think about color, texture, and balance. We’re creating a work of art here, people!
- **Choose a large serving board or platter:** The board is your canvas! Make sure it’s big enough to hold all your goodies without feeling overcrowded.
- **Arrange the cheeses in different areas of the board:** This creates visual interest and makes it easy for people to sample different cheeses.
- **Place crackers and bread around the cheeses:** Make sure there’s plenty of crackers and bread for everyone to enjoy with the cheeses and dips.
- **Add small bowls of dips, olives, and pickled vegetables:** This keeps things organized and prevents the dips from spreading all over the board.
- **Fill in the gaps with fresh and dried fruits, and nuts:** This is where you get to be creative! Arrange the fruits and nuts in a visually appealing way, using different colors and textures to create interest. The fruits e g grapes are a great filler.
- **Arrange artichoke hearts and roasted red peppers attractively:** These add a pop of color and a unique flavor to the board.
- **Add small bowls of jam or honey:** This adds a touch of sweetness and complements the cheeses beautifully.
- **Garnish with fresh herbs:** This adds a pop of color and aroma.
- **Serve immediately or chill for later:** If you’re not serving the board immediately, cover it with plastic wrap and chill it in the refrigerator.
Pro Tips for a Next-Level Board
Want to take your board from basic to boujee? Here are a few pro tips:
- **Vary the textures:** Think creamy cheeses, crunchy nuts, and chewy dried fruits.
- **Play with colors:** Use a variety of colorful fruits, vegetables, and cheeses to create a visually appealing board. Color and texture are vital for visual appeal.
- **Add height:** Use small bowls or ramekins to create different levels on the board.
- **Don’t be afraid to get creative:** There are no rules! Experiment with different ingredients and arrangements until you find something you love.
- **Prep ahead:** Chop veggies, slice cheese, and arrange components ahead of time for easy assembly.
Common Mistakes to Avoid
Even though creating a charcuterie board is easy, here are a few common mistakes to watch out for:
- **Overcrowding the board:** Leave some empty space so people can easily access the ingredients.
- **Using too many of the same type of ingredient:** Variety is key!
- **Not considering dietary restrictions:** Make sure to offer options for people with allergies or dietary restrictions.
- **Forgetting the garnishes:** Fresh herbs and edible flowers add a beautiful finishing touch.
Variations: Remix Your Board!
The beauty of a charcuterie board is that it’s totally customizable! Here are a few variations to inspire you:
- **Mediterranean Board:** Think feta cheese, hummus, olives, pita bread, and roasted vegetables.
- **Sweet and Savory Board:** Combine sweet and savory elements like chocolate-covered pretzels, candied nuts, and spicy cheeses.
- **Holiday Board:** Use seasonal ingredients and colors to create a festive board.
- **Vegan Board:** Use plant-based cheeses, dips, and spreads to create a delicious and satisfying vegan board.
Storage Tips: Keep It Fresh
Got leftovers? No problem! Here’s how to store your charcuterie board:
- **Wrap it tightly:** Wrap the board tightly with plastic wrap to prevent the ingredients from drying out.
- **Store in the refrigerator:** Store the board in the refrigerator for up to 2-3 days.
- **Reassemble before serving:** Before serving, reassemble the board and add any fresh ingredients that may have wilted.
Frequently Asked Questions
Got questions? I’ve got answers!
- **Can I make this board ahead of time?** Absolutely! You can assemble the board up to 24 hours in advance. Just wrap it tightly and store it in the refrigerator.
- **What kind of cheeses should I use?** Use a variety of cheeses, including soft, semi-hard, and hard cheeses.
- **What kind of crackers should I use?** Use a variety of crackers, including crispy crackers, whole-wheat crackers, and gluten-free crackers.
- **Can I use fresh herbs that aren’t rosemary or thyme?** Of course! Use any fresh herbs you like. Basil, mint, and parsley are all great options.
Serving Suggestions: Make It a Party!
Your vegetarian charcuterie board is ready to steal the show! Here are a few serving suggestions to make it a party:
- **Pair it with wine:** A crisp white wine or a light-bodied red wine pairs perfectly with a vegetarian charcuterie board.
- **Serve it as an appetizer:** A charcuterie board is the perfect appetizer for any gathering.
- **Make it a meal:** Add some grilled vegetables or a simple salad to make it a complete meal.
- **Get creative with the presentation:** Use different platters, bowls, and serving utensils to create a visually appealing display.
Creating a charcuterie board is creating a memory! So, grab your favorite ingredients, gather your friends, and get ready to indulge in a delicious and visually stunning experience. Trust me, this Vegetarian Charcuterie Board will be the talk of the town! You’re building a board with intention and care. The fresh vegetables and dried fruits add to the overall sensory experience. Creating a charcuterie board for easy snacking is a fun and rewarding experience. You’re going to feel like a culinary rockstar!

Vegetarian Charcuterie Board
Ingredients
Method
- Choose a large serving board or platter.
- Arrange the cheeses in different areas of the board.
- Place crackers and bread around the cheeses.
- Add small bowls of dips, olives, and pickled vegetables.
- Fill in the gaps with fresh and dried fruits, and nuts.
- Arrange artichoke hearts and roasted red peppers attractively.
- Add small bowls of jam or honey.
- Garnish with fresh herbs.
- Serve immediately or chill for later.
Notes
Loved this recipe? Save it to your favorite Pinterest board so you can easily find it later! ✨