Buzzworthy Baking: Yellow Bee Cake That’s the Bee’s Knees!
Okay, besties, get ready to be OBSESSED! I’m about to drop a cake recipe that’s *literally* the cutest thing you’ll ever see. We’re talking a Yellow Bee Cake with Daisies – a total game-changer for spring, summer, or, like, ANY celebration that needs a little sunshine. This isn’t just a cake; it’s a whole vibe. Get your cameras ready because this one’s going straight to the ‘gram!
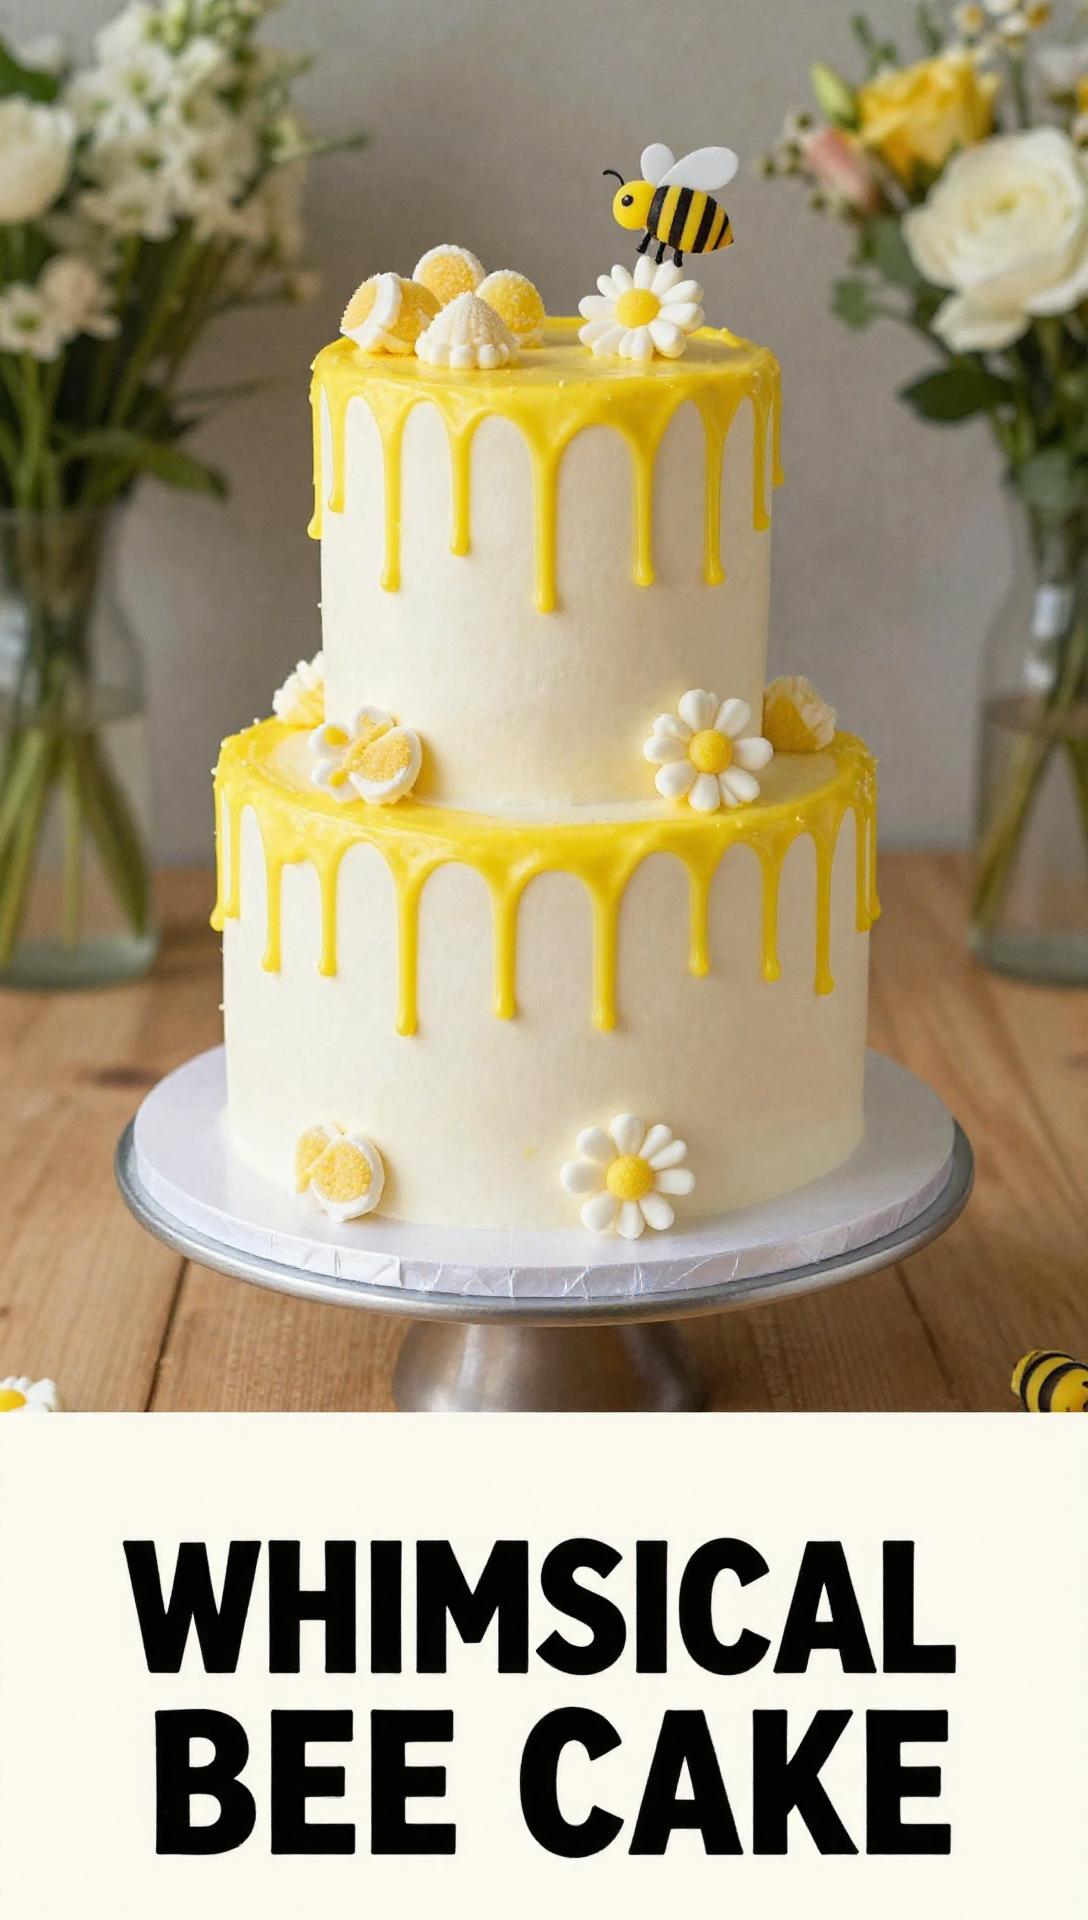
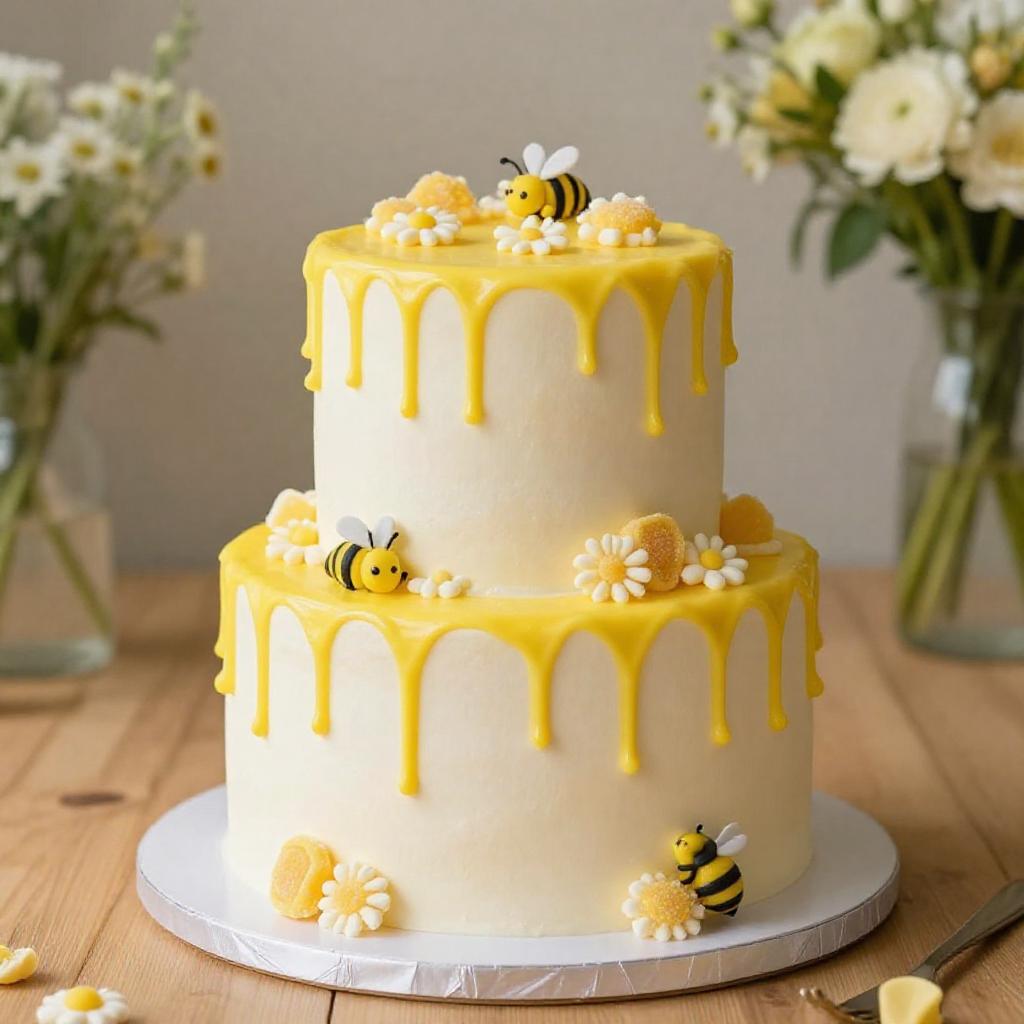
This whimsical yellow bee cake is adorned with buttercream, candy melts, and fondant daisies, perfect for a sweet spring or summer celebration. It’s the perfect cake for a Bee Cakes Birthday, Bee Cake First Birthday, or even a Sweet To Bee Three Birthday Party!
Why You’ll Love This Yellow Bee Cake
Trust me, you NEED this cake in your life. Why? Let me break it down:
- Instagrammable AF: Seriously, the photos will slay. Yellow drip, cute daisies, tiny bees? Hello, viral content!
- Surprisingly Easy: Don’t let the looks fool you. This cake is totally doable, even if you’re not a pro baker. We’re using a cake mix, people!
- Flavor Explosion: The combo of moist yellow cake, creamy vanilla buttercream, and sweet candy melts is pure heaven.
- Customizable: Want to switch up the colors? Add more bees? Go wild! This recipe is your canvas.
- Major Compliment Magnet: Prepare for everyone to ask you where you bought this cake. And you get to say, “I MADE IT!” *hair flip*
Yellow Bee Cake Ingredients: The Lineup
Alright, let’s gather our supplies. Here’s what you’ll need to create this masterpiece:
- Yellow Cake Mix (and ingredients called for on the box): The foundation of our deliciousness. I recommend a good quality mix for the best results.
- Yellow Food Coloring (gel recommended): For that vibrant, sunshine-y hue. Gel food coloring gives you the most intense color.
- Vanilla Buttercream Frosting: Store-bought or homemade, your call! But a smooth, creamy buttercream is key.
- Yellow Candy Melts: To create that stunning drip effect.
- Heavy Cream (for the drip): A little bit of cream makes the candy melts perfectly drippy.
- Daisy Candies or Fondant Daisies: The cutest decorations EVER. You can find these at most craft stores or online.
- Black Fondant or Edible Marker: For making the adorable bee stripes.
- Honeycomb Candy (optional): Adds a touch of extra sweetness and bee-themed flair.
- Edible Gold Luster Dust (optional): For making your bees extra fancy!
Let’s Get Baking: Bee Cake Step-by-Step
Okay, buckle up, buttercups! It’s time to turn this ingredient list into a stunning Yellow Bee Cake. I’m going to walk you through it step-by-step, so you can’t mess this up! Remember, this cake is perfect for a Honey Bee Theme Cake, Bee Birthday Cake Ideas, or Bumble Bee Birthday Party!
- Bake the Cake: First, prepare your yellow cake batter according to the box instructions. Now, here’s the hack: add a few drops of yellow food coloring to achieve that super vibrant yellow color. Bake the cake in round cake pans – I recommend two 8-inch pans for a nice, tall cake. The cake layers are the foundation of this masterpiece.
- Cool and Level: This is crucial! Let the cakes cool COMPLETELY before you even THINK about frosting. Once they’re cool, use a serrated knife to level the tops. This ensures that your cake will be perfectly even and stack beautifully.
- Frost the Cake: Place one cake layer on a serving plate or cake stand. Slather on a generous layer of vanilla buttercream frosting. Repeat with the remaining layers, and then frost the entire cake – top and sides – with a smooth layer of buttercream. This is your canvas, so make it pretty!
- Prepare the Yellow Drip: This is where the magic happens! In a microwave-safe bowl, melt the yellow candy melts with a tablespoon or two of heavy cream. Microwave in 30-second intervals, stirring until smooth. If the drip is too thick, add a little more cream until it reaches the perfect consistency – you want it to be pourable but not too runny.
- Create the Drip: Now for the fun part! Carefully pour the melted yellow candy over the edges of the cake, allowing it to drip down the sides. You can use a spoon or a piping bag for more control. Let the drip set completely before moving on.
- Decorate with Daisies: Arrange your daisy candies or fondant daisies on top of the cake. Get creative with the placement! You can create a simple ring of daisies around the edge or pile them high in the center.
- Make the Bees (Optional): Okay, these are optional, but they take the cake to the next level! Roll small balls of black fondant. Shape them into tiny bee bodies. Use an edible marker to draw stripes on their backs. Add small white fondant wings. For an extra touch of sparkle, dust them with edible gold luster dust. Place the bees around the cake – flying, crawling, whatever your heart desires!
- Add Honeycomb (Optional): For an extra touch of sweetness and bee-themed flair, place pieces of honeycomb candy around the base of the cake.
- Chill and Serve: Refrigerate the cake for at least 30 minutes to allow the frosting and drip to set. This will also make it easier to slice and serve. And that’s it! You’ve created a masterpiece!
Pro Tips for the Perfect Bee Cake
Want to take your Bee Cake game to the next level? Here are a few of my top-secret pro tips:
- Chill the Cake Layers: Wrap your cake layers in plastic wrap and chill them in the fridge for at least an hour before frosting. This makes them easier to handle and prevents them from crumbling.
- Use a Turntable: A cake turntable makes frosting SO much easier. It allows you to smoothly rotate the cake while you’re applying the buttercream.
- Practice Your Drip: Before you pour the drip onto the cake, test it out on a small bowl or plate to make sure the consistency is perfect.
- Get Creative with Decorations: Don’t be afraid to add your own personal touch! Use different colors of candy melts, add sprinkles, or create your own custom fondant decorations.
Common Mistakes to Avoid
We all make mistakes, but here are a few common pitfalls to watch out for when making this cake:
- Overbaking the Cake: Dry cake is a tragedy! Be sure to check the cake frequently while it’s baking and don’t overbake it.
- Frosting a Warm Cake: This is a big no-no! The frosting will melt and slide right off. Always make sure the cake is completely cool before frosting.
- Making the Drip Too Thin: If the drip is too thin, it will run right off the cake. Add more candy melts to thicken it up.
- Using Lumpy Frosting: Nobody wants lumpy frosting! Make sure your buttercream is smooth and creamy before you start frosting the cake.
Variations: Bee-yond the Basics
Want to put your own spin on this recipe? Here are a few fun variations to try:
- Honey Cake: Use a honey cake mix instead of yellow cake for a more intense honey flavor. You can even add a swirl of honey to the buttercream.
- Lemon Cake: Use a lemon cake mix and add lemon zest to the buttercream for a bright, citrusy twist.
- Chocolate Cake: For all you chocolate lovers out there, use a chocolate cake mix and make a chocolate buttercream frosting.
- Different Colors: Get creative with the colors! Use pink and purple candy melts for a spring-themed cake, or orange and brown for a fall-themed cake.
Storage: Keeping Your Cake Fresh
To keep your Yellow Bee Cake fresh and delicious, store it in an airtight container in the fridge for up to 3 days. Before serving, let it sit at room temperature for about 30 minutes to soften the frosting.
Frequently Asked Questions (FAQ)
Got questions? I’ve got answers! Here are some of the most common questions I get about this recipe:
- Can I make this cake ahead of time? Absolutely! You can bake the cake layers and make the frosting up to 2 days in advance. Store them separately in the fridge until you’re ready to assemble the cake.
- Can I freeze this cake? Yes, you can freeze the cake layers or the entire frosted cake. Wrap them tightly in plastic wrap and then in aluminum foil. They can be frozen for up to 2 months. Thaw in the fridge overnight before serving.
- Can I use a different type of frosting? Of course! If you’re not a fan of vanilla buttercream, you can use cream cheese frosting, chocolate frosting, or any other type of frosting you like.
- Where can I find daisy candies or fondant daisies? You can find them at most craft stores, baking supply stores, or online.
Serving Suggestions: The Grand Finale
This Yellow Bee Cake is the perfect centerpiece for any celebration! Serve it at a birthday party, a baby shower, a bridal shower, or just because! Pair it with a glass of milk, a cup of coffee, or a scoop of ice cream for the ultimate sweet treat.
So there you have it, my loves! The ultimate Yellow Bee Cake recipe that’s guaranteed to impress. Now go forth and bake something amazing! Don’t forget to tag me in your photos – I can’t wait to see your creations! This cake is so easy to make, that if you don’t make the cake, I’m going to be very upset. You can decorate this cake from your own imagination! This cake is a guaranteed crowd-pleaser, and I recommend you make this cake today!
I’m so excited for you to make this cake! You’re going to love the honey buttercream, so that you can enjoy every bite. This Yellow Bee Cake is the perfect addition to your Bee Party Decor and Honey Bee Cake Ideas!

Whimsical Bee Cake
Ingredients
Method
- Bake the Cake: Prepare batter per box instructions. Add yellow food coloring. Bake in round pans.
- Cool and Level: Cool cakes completely. Level the tops with a serrated knife.
- Frost the Cake: Place one layer on a plate. Frost with buttercream. Repeat with layers, frosting the entire cake.
- Prepare the Yellow Drip: Melt candy melts with cream until smooth. Add more cream for a thinner drip.
- Create the Drip: Pour melted candy over the edges, allowing it to drip. Let set.
- Decorate with Daisies: Arrange daisies on top of the cake.
- Make the Bees (Optional): Roll black fondant into bee bodies. Draw stripes. Add white wings. Dust with gold luster dust. Place around the cake.
- Add Honeycomb (Optional): Place honeycomb candy around the base.
- Chill and Serve: Refrigerate for 30 minutes. Slice and serve.
Notes